
THE WAY I LIKE TO MAKE FLYING GEESE
I used to be intimidated by Flying Geese, but not anymore. I am going to show you how to make Flying Geese easy and fun. I’ll also be sharing my big secret with you. Ready?

Step 1:
This is it. My big secret. Terial Magic. It is the best fabric stabilizer. It is just like starch, but makes the fabric feel more like paper. It has helped me at being a better piercer. I always do a Google search to find the best price.
Take the fabric and apply Terial Magic or your preferred starch. Get the fabric good and stable.

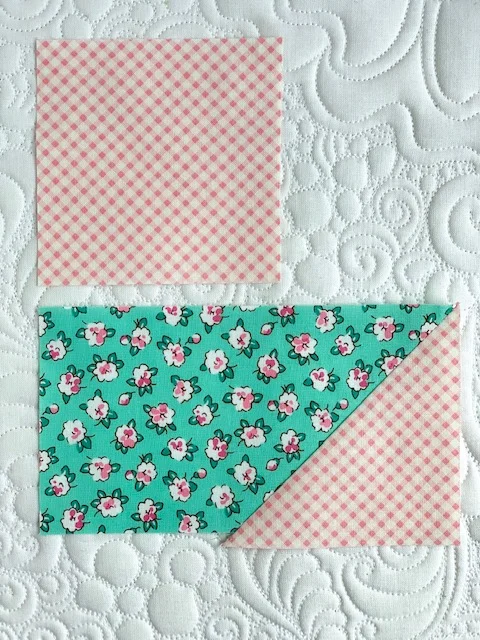
Step 2:
Cut (2) 3 3/4” x 3 3/4” squares and (1) 3 1/2” x 6 1/2” rectangle.

Step 3:
On the wrong side of the (2) 3 3/4” x 3 3/4” squares, draw a line from one corner to the opposite corner. I always like to use a mechanical pencil.

Step 4:
Place (1) of the 3 3/4” x 3 3/4” squares right sides together on the 6 1/2” x 3 1/2” rectangle. Sew on the pencil line as shown.

Trim 1/4” away from the sew line and then press your fabric back.
It should look like this.

There will be extra fabric hanging over.

Step 5:
Do the same thing as Step 4, but on the opposite side.

Trim 1/4” from the sew line, and press your fabric back.

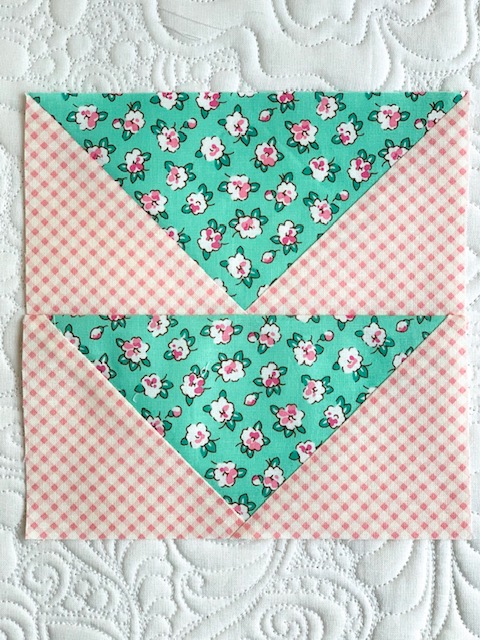
Step 6:
The block will measure 6 1/2” x 3 3/4”.

The block should measure 1/2” at the point.

Trim it to 1/4” as shown.

Here is the completed block, all squared up and ready to play.
I hope this tutorial helped. Please contact me if you have any questions.
Happy Sewing/Quilting,
Debbie